
Master the Albright Knot: Your Ultimate Guide with Step-by-Step Instructions & Tips from Knot Master. Learn to tie this reliable knot for fishing and more!
The Albright knot is a popular and highly effective knot used to join two fishing lines of different diameters. Its strength and reliability make it a favorite among anglers, particularly when connecting a heavier leader line to a lighter main line. This detailed guide will walk you through the process, ensuring you can confidently tie this crucial knot.
Why Choose the Albright Knot?
The Albright knot excels because it creates a small, smooth knot that minimizes friction and maximizes strength. Unlike some knots that weaken the line, the Albright knot preserves a significant percentage of the line’s original breaking strength, making it ideal for critical situations where line strength is paramount. Its design is particularly well-suited for connecting lines of significantly different diameters, a common scenario in fishing.
- High Strength: Maintains a high percentage of original line strength.
- Smooth Profile: Reduces friction and prevents line damage.
- Suitable for Dissimilar Diameters: Ideal for joining heavy leader lines to lighter main lines.
- Relatively Easy to Tie: With practice, it becomes a quick and efficient knot.
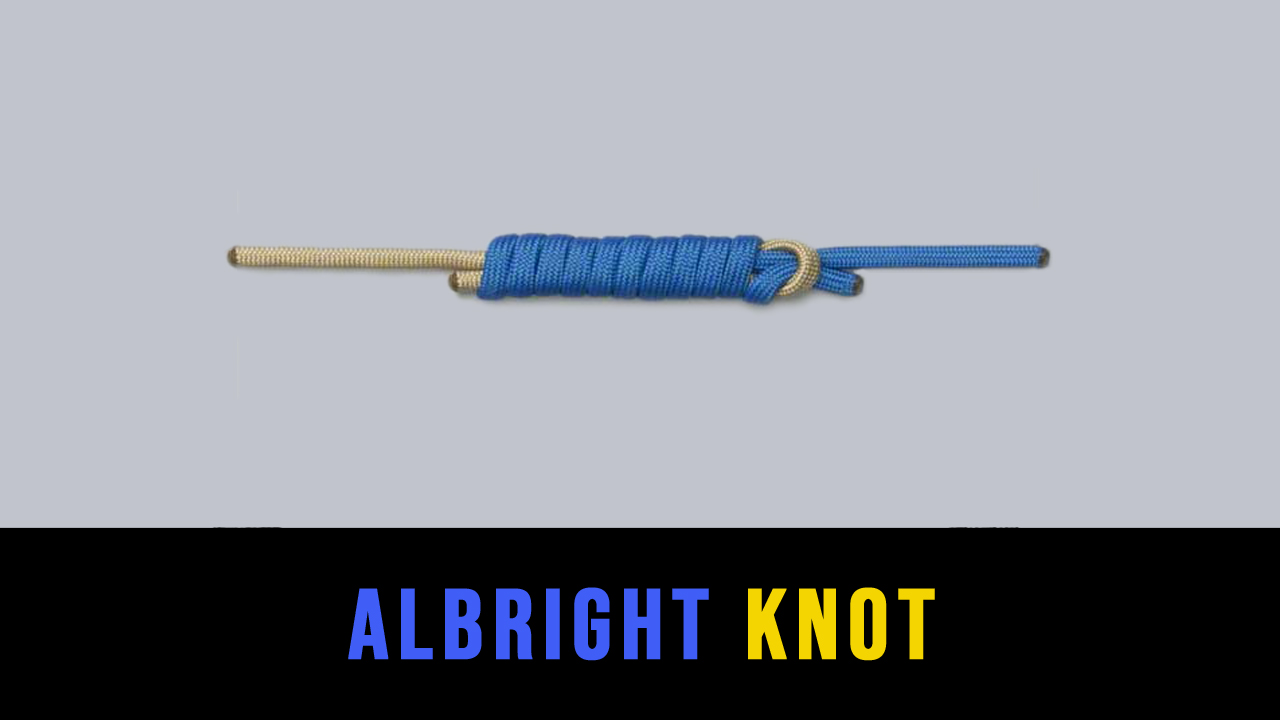
How to Tie the Albright Knot: A Step-by-Step Guide
The key to a successful Albright knot lies in meticulous winding. Take your time, and focus on neat, even wraps.
Materials: Two lines of different diameters (e.g., heavier leader line and lighter main line).
Steps:
- Create the Initial Loop: Form a loop with the larger diameter line (typically your main line), leaving a tag end of approximately 6 inches.
- Insert the Smaller Line: Insert the smaller diameter line (your leader line) through the loop, from the bottom. Ensure the tag end of the smaller line is pointing upwards.
- Begin Winding: With the smaller line, begin wrapping it tightly around the larger loop. Aim for at least five wraps, more is better for larger diameter differences. Keep the wraps tight and even, holding them firmly with your fingers as you go.
- Secure the Wraps: After completing the wraps, tuck the tag end of the smaller line back underneath the wraps, threading it through the initial loop you created with the larger line.
- Wet and Tighten: Wet the knot thoroughly with saliva or water. This helps the lines to grip and reduces the chance of slipping. Gently but firmly tighten the knot by pulling on both lines, keeping a consistent tension on both tag ends.
- Trim the Tag Ends: Trim the tag ends close to the knot, leaving just a small amount to prevent unraveling.
Related Fishing Knots
While the Albright knot is excellent for connecting lines of different diameters, other knots serve different purposes:
- Improved Clinch Knot: A versatile knot for attaching lures or hooks to your line. It’s relatively easy to learn and widely used.
- Palomar Knot: Another strong and reliable knot for attaching lures or hooks. Known for its strength and simplicity.
- Blood Knot: Used to join two lines of similar diameter.
The Albright knot is an essential tool in any angler’s arsenal. Its strength, reliability, and suitability for joining lines of differing diameters make it a superior choice for many fishing situations. Practice makes perfect, so take some time to master this knot and enhance your fishing experience. Remember to always check your knots before casting to ensure a secure connection.